Learn how to customize your data exports to get exactly the information you need with SyncRange.
Understanding Export Configuration
After creating a new export and setting its schedule, you'll need to configure what data is included in the export. This page covers the general configuration options available across different data sources.
Each data source (Google Analytics, Search Console, Ads, Shopify, etc.) has its own specific configuration options, but they follow similar patterns and principles.
Common Configuration Elements
Most data exporters include these common configuration elements:
Basic Settings
Export Name: A descriptive name for your export that helps you identify it
Date Range: The time period for which data should be exported. Rolling presets (e.g. last 7 days, last 30 days) are recalculated on each run and work with schedules. Custom range uses a fixed start and end date (maximum 1 year) and is manual only. Use Run now until you switch back to a preset.
Append Data: Whether new data should be added to existing data or replace it
Dimensions
Dimensions are attributes of your data that you can use to organize and segment your reports.
Most exporters allow you to select multiple metrics to measure different aspects of performance
Filters
Filters allow you to include only specific data in your export.
Examples: Only include traffic from specific countries, only include certain products
Filters help focus your exports on the most relevant data
Available filters vary by data source
Date Range Options
Most exporters include a date range selector on the configuration page. What you pick depends on whether you want ongoing updates or a one-off historical pull:
Rolling presets (Today, Yesterday, Last 7/30/90 days, This month, and similar): the window is recalculated from the current date each time the export runs. These work with recurring schedules.
Since last export (where the source supports it): incremental sync from the last successful run; suited to append mode on scheduled exports.
Custom range: choose exact From and To dates (maximum 1 year; the end date cannot be in the future). Dates use your account timezone when set, otherwise UTC. Each run exports that same calendar period. Scheduled runs are paused while a custom range is selected. Use Run now. Switch back to a rolling preset to use a schedule again.
Source-specific limits still apply. For example, Shopify Backup (10 years) is a separate manual-only option, and Search Console can only return data for the period Google’s API allows. See each integration’s configure guide for which tabs are date-filtered.
Configuration Process
The general process for configuring an export follows these steps:
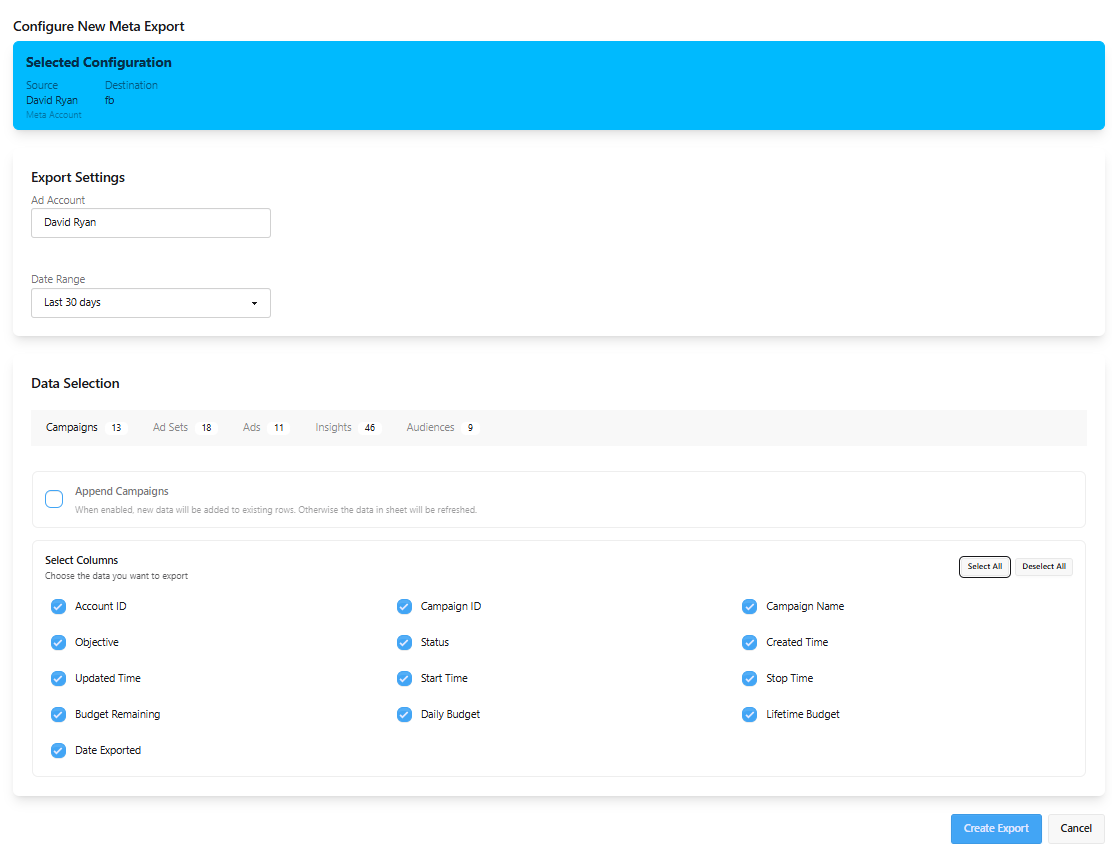
Example of an export configuration interface
Select Basic Settings: Set the export name and date range
Choose Dimensions: Select how you want to break down your data
Select Metrics: Choose what measurements you want to include
Apply Filters (if available): Narrow down the data to specific segments
Configure Data Handling: Decide whether to append or replace existing data
Save Configuration: Finalize your export settings
Configuration Best Practices
Start Simple: Begin with fewer dimensions and metrics, then expand as needed
Consider Sheet Size: Google Sheets has limits on the number of cells. Too many dimensions and metrics can lead to very large exports
Group Related Data: Create separate exports for different types of data rather than trying to include everything in one export
Use Meaningful Names: Name your exports clearly to make them easy to identify
Test Your Configuration: After setting up an export, run it once manually to verify it produces the expected results

 Install on Shopify